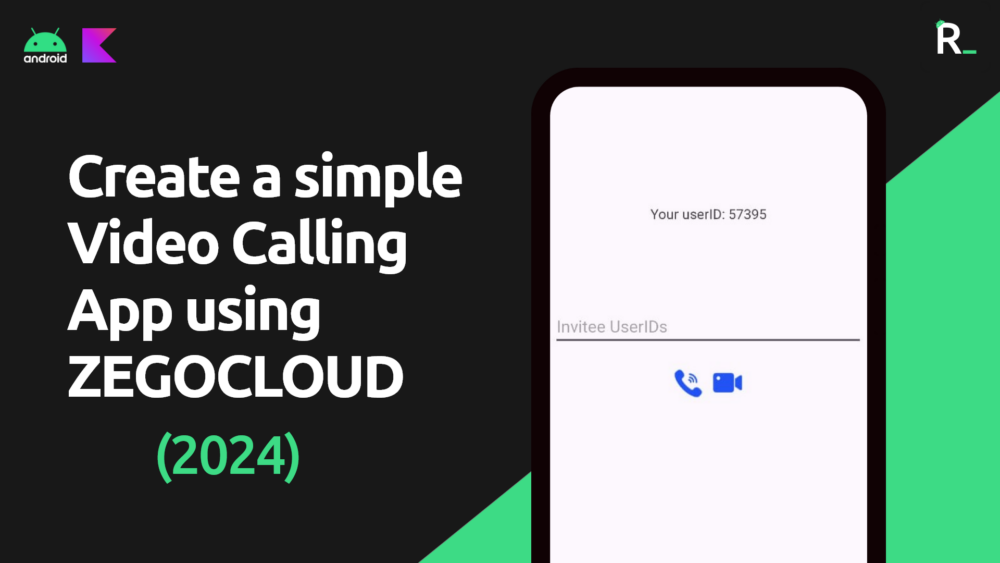
ZEGOCLOUD is a amazing service which offers Voice calling, Video calling and streaming APIs to help you easily develop powerful apps. In this blog, we will use their video calling API to easily create a simple video calling app in android studio.
1. Create ZEGOCLOUD account
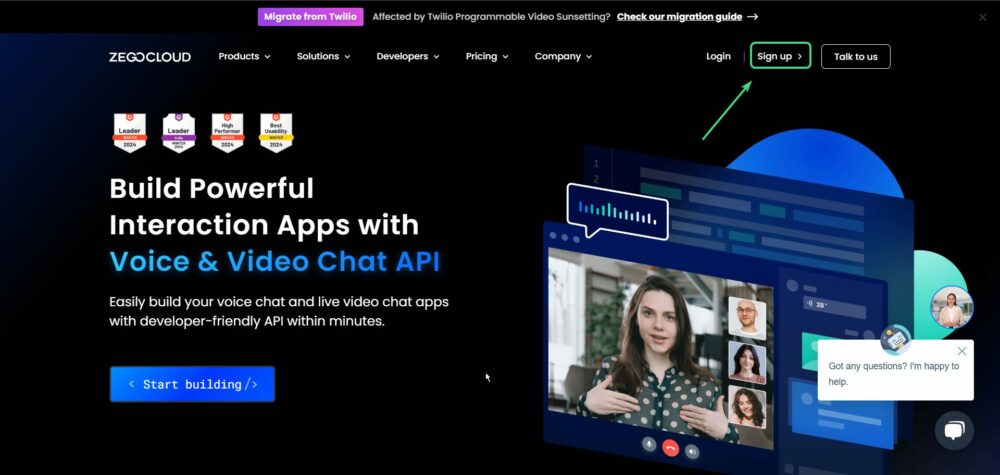
To use ZEGOCLOUD API for our video calling, we first need to create ZEGOCLOUD account. So open ZEGOCLOUD’s official website and create a account.
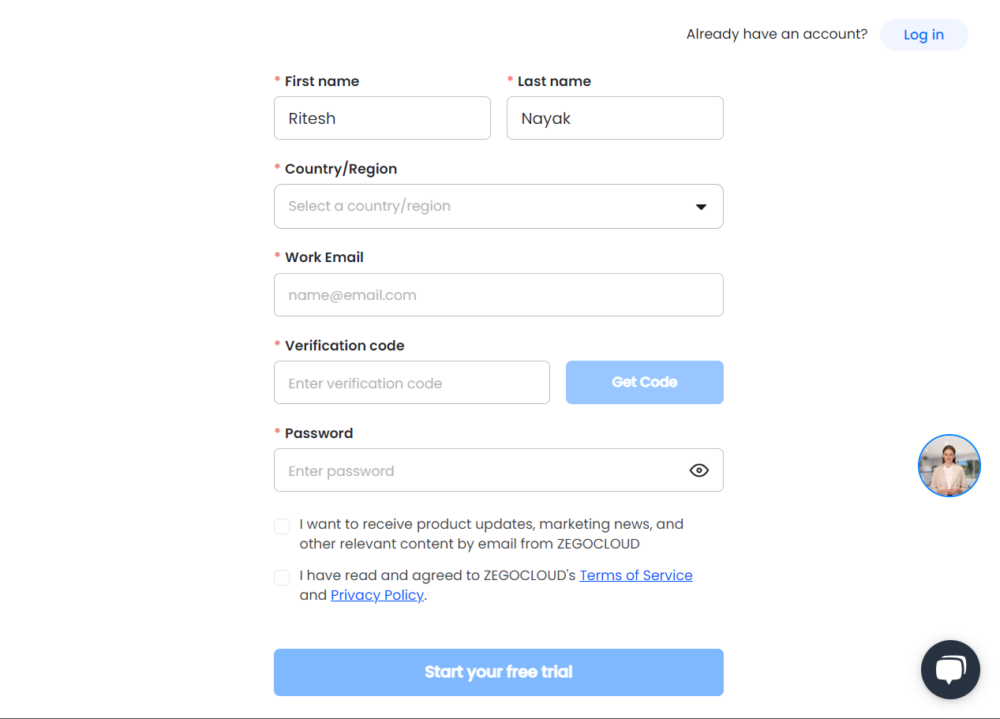
In the next page, fill all the details and verify the email next read the terms and conditions and privacy policy and check the box. Next, click on the “Start your free trial” button. You will get 10,000 free minutes to try out the service.
Fill all the details and start free trial
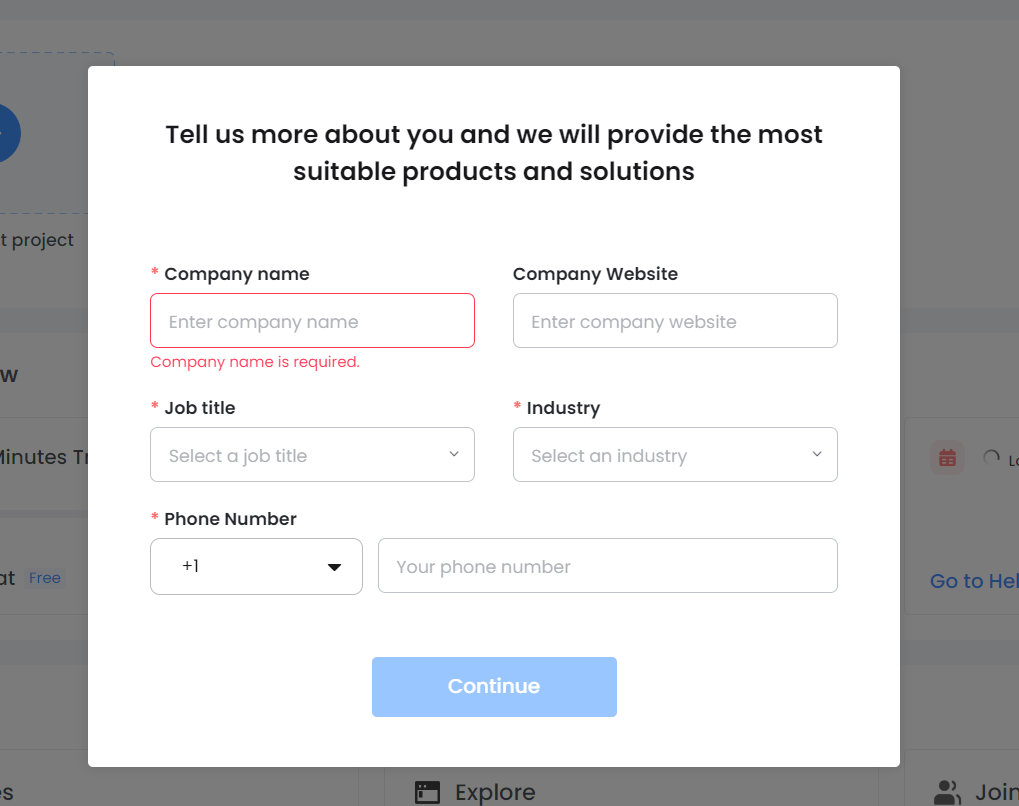
Here you need to fill your company details and you are good to go.
2. Create a ZEGOCLOUD project
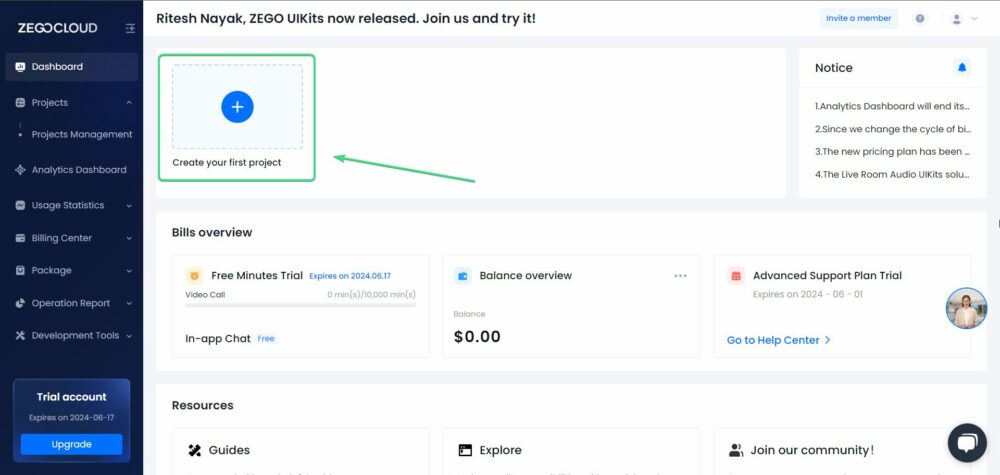
Once you have created a ZEGOCLOUD account, you need to create a ZEGOCLOUD project to get your uniqe AppID and AppSign. So click on the “create your first project”.
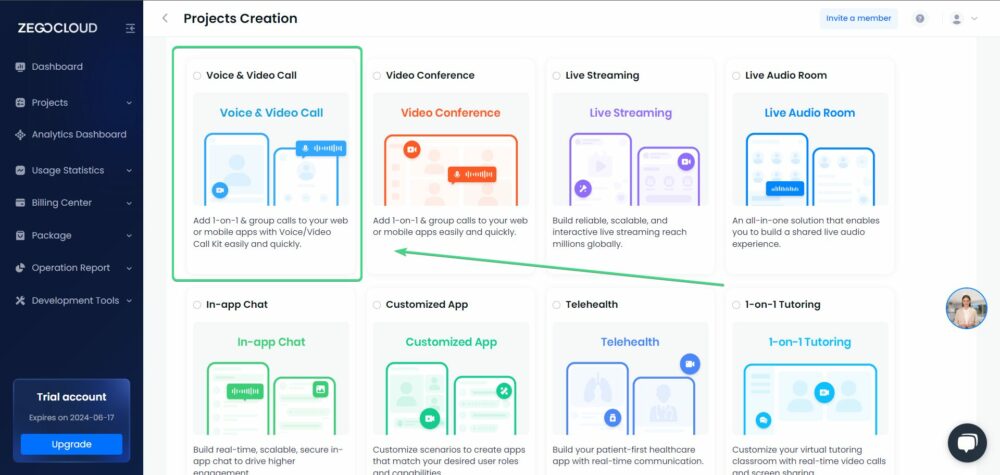
As we are creating a video calling app, select Voice & Video call here.
Next give your project a name. You can select your app name as your project name.
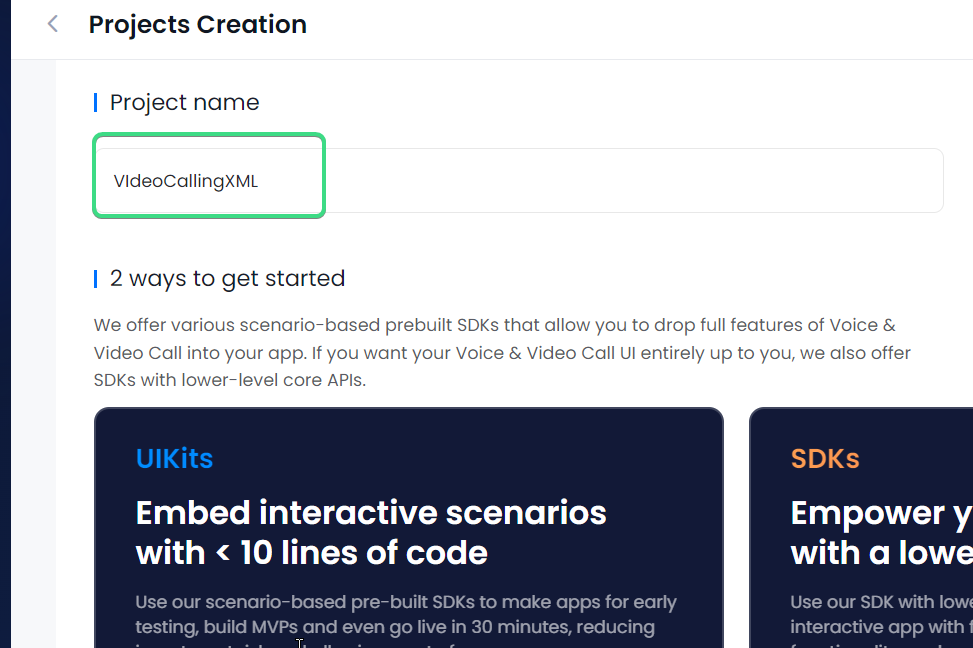
Now in ZEGOCLOUD, you can create your app in two ways. Either you can use ZEGOCLOUD prebuilt UIKits and save a ton of time or you can choose to go with SDKs and have more control over each and every part of the video calling process.
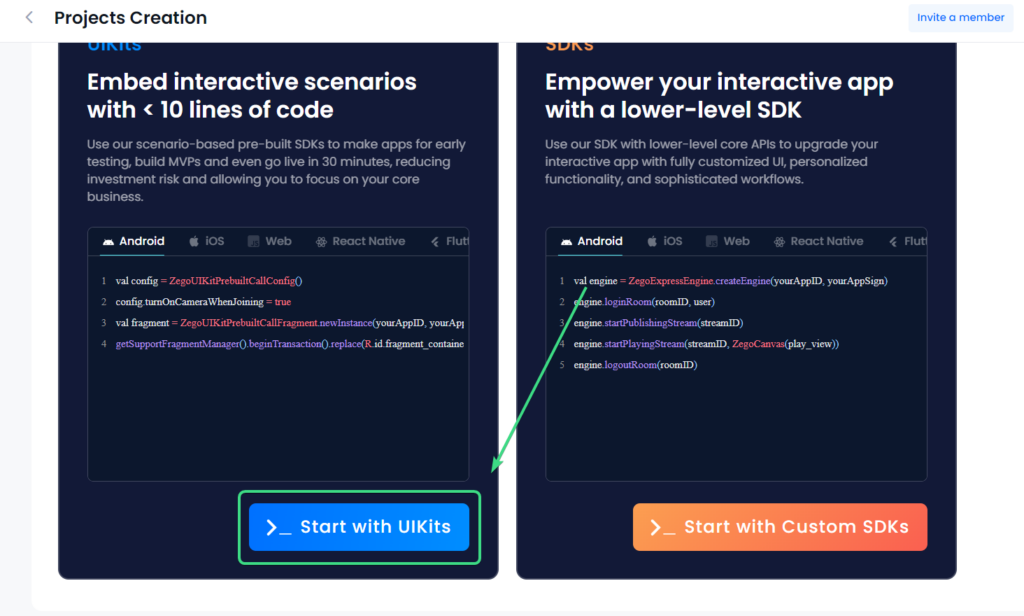
In this blog, as we are creating a simple app, we will go the UIKits. So select “Start with UIKits”
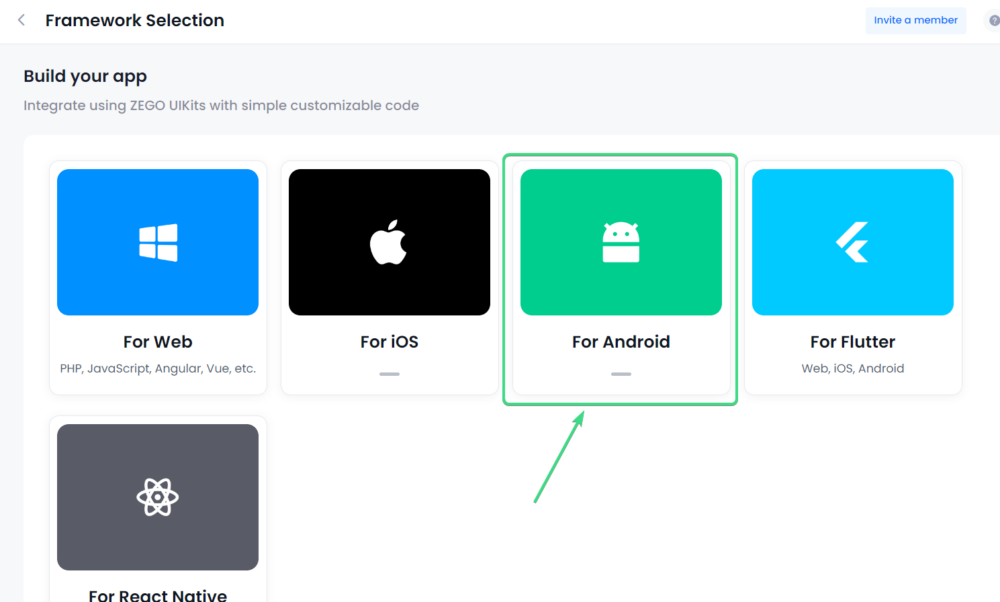
Select android in this step, as we are creating a Android app.
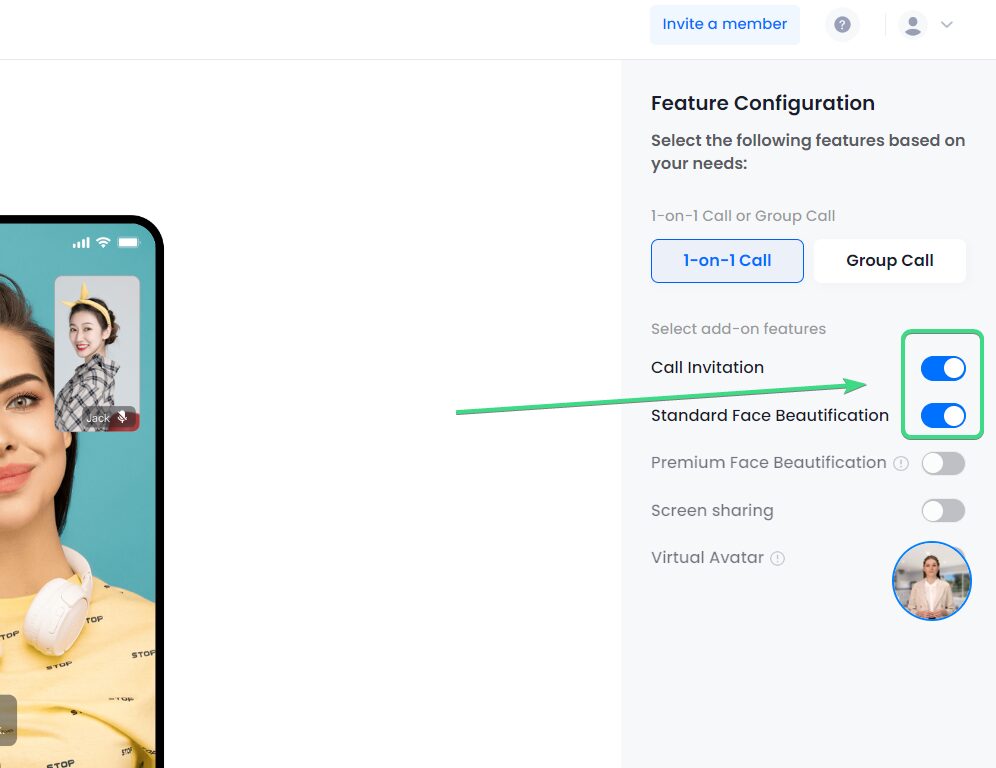
Now leave these as default.
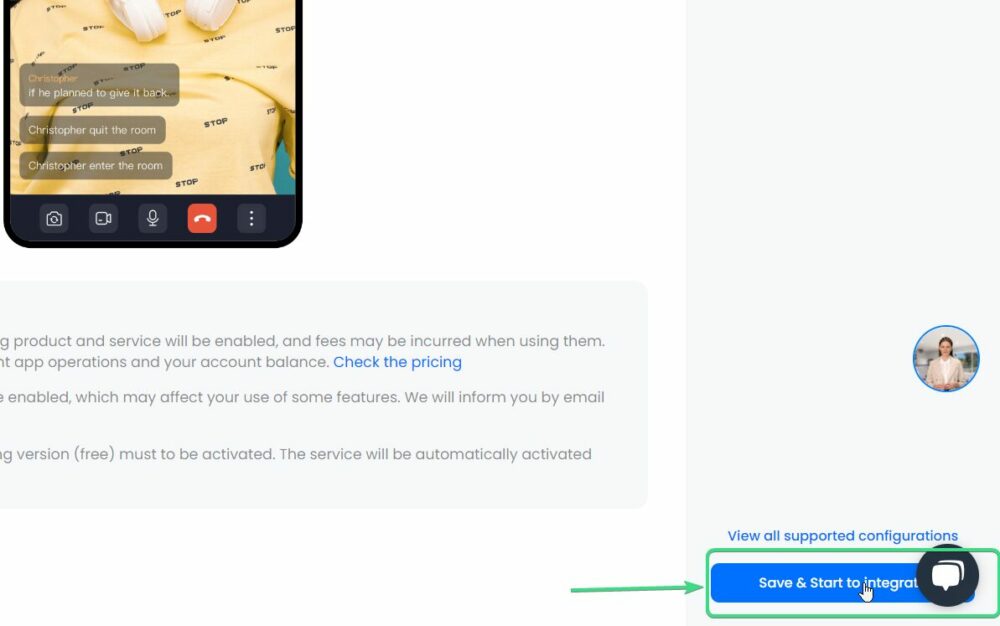
Next, click on “Save & Start integration”
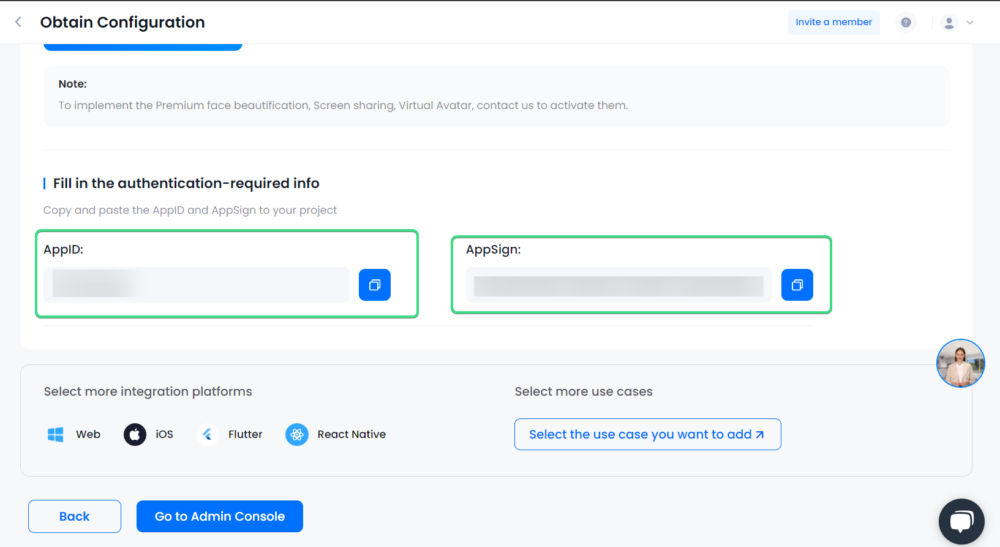
Here, you can copy your AppID and AppSign.
3. Create your app
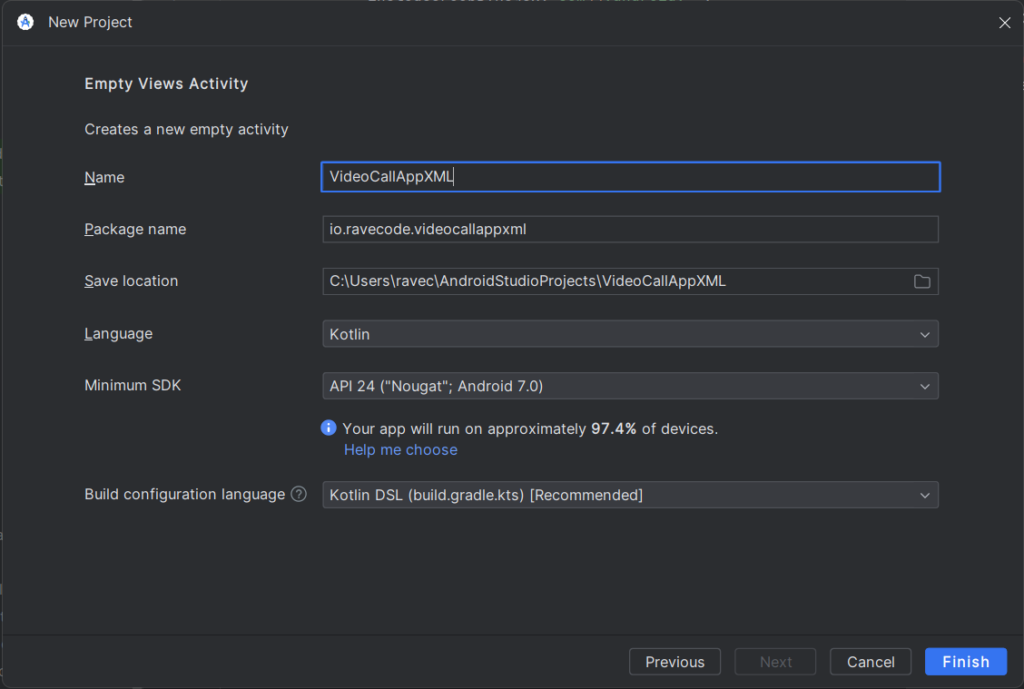
Now we will create the Android project. So, create a new project and select “Empty Views Activity”. Next, give your project a Name and fill the rest of the details and hit “Finish”. You can see our configuration below.
4. Add dependencies
Now we will add a few dependency. Open your “settings.gradle.kts” from the projects window. And paste the below code in the repositories{} block inside dependencyResolutionManagement{}
maven ( url = URI("https://storage.zego.im/maven") )
        maven ( url = URI("https://www.jitpack.io") )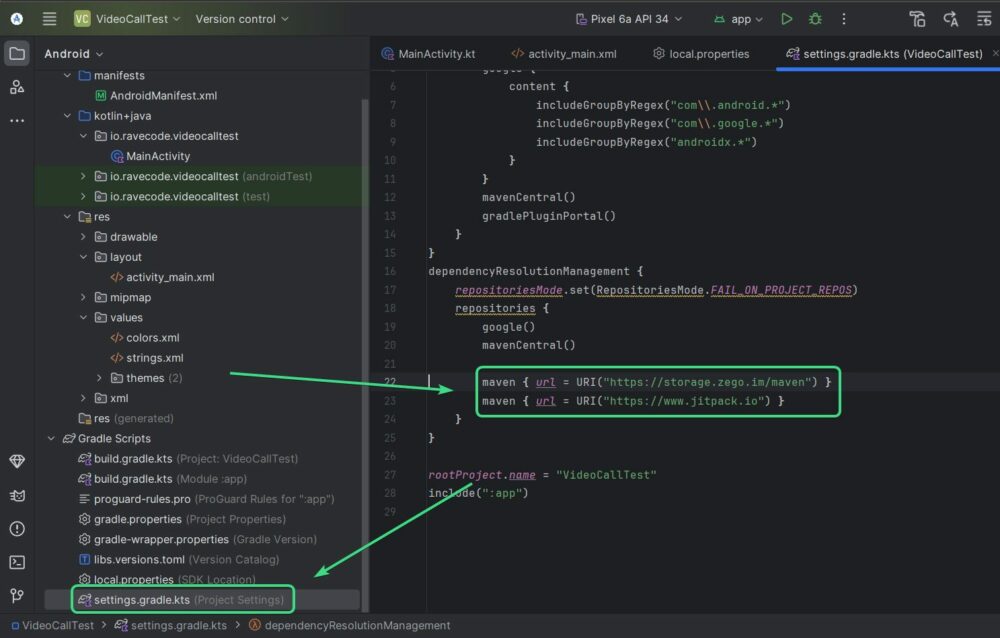
Now open app level build.gradle and paste the below dependency in the dependencies{} block.
implementation("com.github.ZEGOCLOUD:zego_uikit_prebuilt_call_android:+")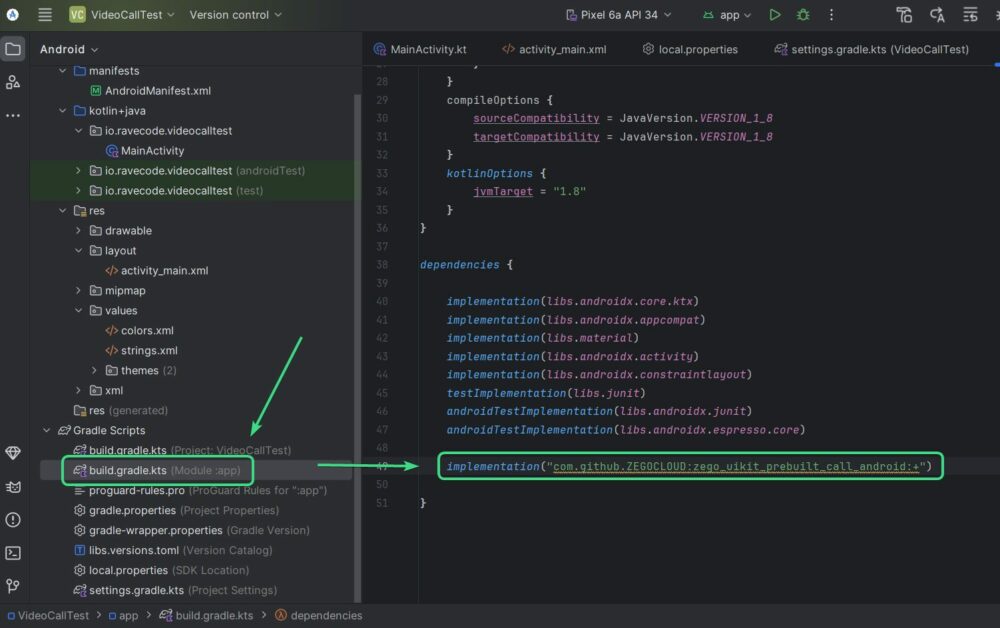
5. activity_main.xml: Designing the UI
5.1 Displaying userID
Now let’s design the UI. Here is the code snippet where we will show a randomly generated userID. If you are working on a production app, you probably don’t need to show the userID and you can the userID from firebase after authentication as the userID for ZEGOCLOUD too.
<TextView
        android:id="@+id/your_user_id"
        android:layout_width="wrap_content"
        android:layout_height="wrap_content"
        android:text="Your UserID:"/>
5.2 Getting target user ID from user
Here is a EditText to get the userID of the person whom the user wants to call. In this case too, you can show a list of names of the users and get the userID of those from the backend.
<EditText
            android:id="@+id/target_user_id"
            android:layout_width="match_parent"
            android:layout_height="wrap_content"
            android:hint="Invitee UserIDs"/>
5.3 Adding Video calling and Voice calling buttons
Next here we are using buttons provided by ZEGOCLOUD which will move the user to the call screen.
<LinearLayout
            android:layout_width="match_parent"
            android:layout_height="wrap_content"
            android:gravity="center"
            android:orientation="horizontal">

            <com.zegocloud.uikit.prebuilt.call.invite.widget.ZegoSendCallInvitationButton
                android:id="@+id/new_voice_call"
                android:layout_width="48dp"
                android:layout_height="48dp" />

            <com.zegocloud.uikit.prebuilt.call.invite.widget.ZegoSendCallInvitationButton
                android:id="@+id/new_video_call"
                android:layout_width="48dp"
                android:layout_height="48dp"/>

        </LinearLayout>
5.4 Adding userID string in strings.xml
Now you need to open the strings.xml from res -> values -> strings.xml and add the below block of code.
<string name="your_user_id">Your userID: %s</string
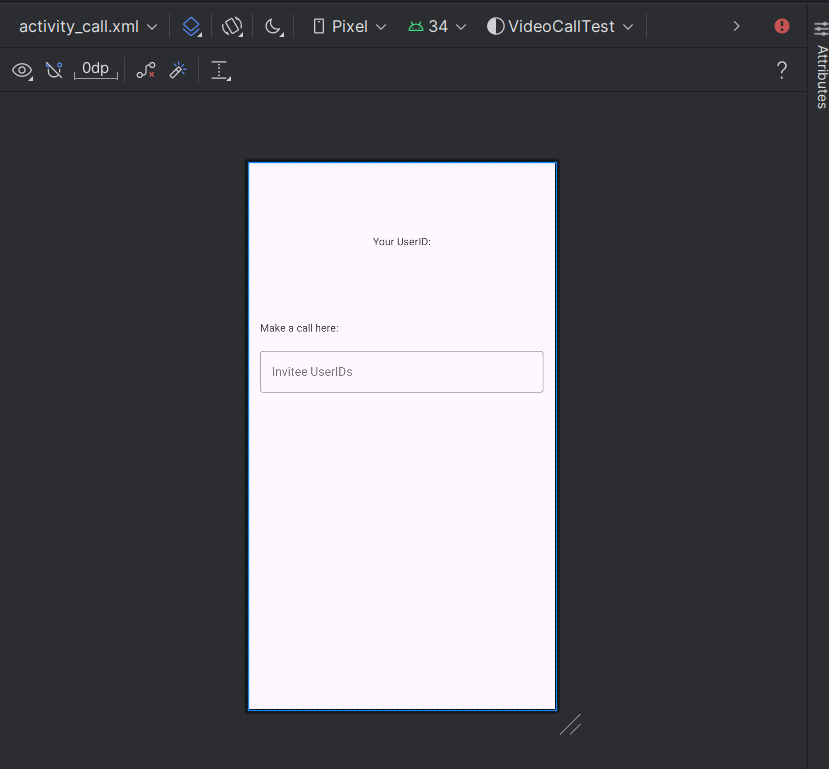
Here you can see the final design. On the top, we will show the user it’s own userID and their is a EditText to get the target userID of the other person whom he/she wants to call.
6. MainActivity
6.1 Setup of userID and userName
Now we will generate a random userID from 10000 to 99999 and show it in our UI. We will set the user name of the user as “user_<userID>”.
So first initialize the variables with the below block of code.
private lateinit var userID: String
    private lateinit var userName: String
Now set the userID and username with the below code. Just copy and paste it in inside youronCreate{} function.
val yourUserID = findViewById<TextView>(R.id.your_user_id)
        userID = Random.nextInt(10000, 99999).toString()
        userName = "User_${userID}"
        yourUserID.text = getString(R.string.your_user_id, userID)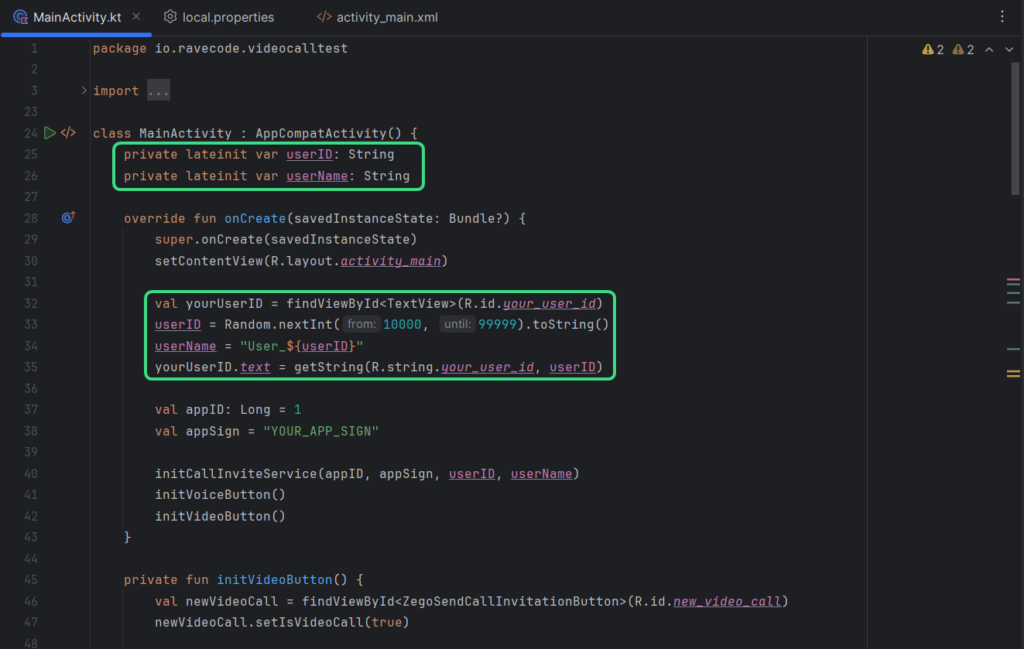
6.2 Bringing the AppID and AppSign
Now we have to create two variables to store the AppID and AppSIgn. You can get these two values from ZEGOCLOUD console. Instead of directly pasting these in the MainActivity, consider storing these values inside your local.properties file using the Secrets Gradle plugin.
val appID: Long = 1
        val appSign = "YOUR_APP_SIGN"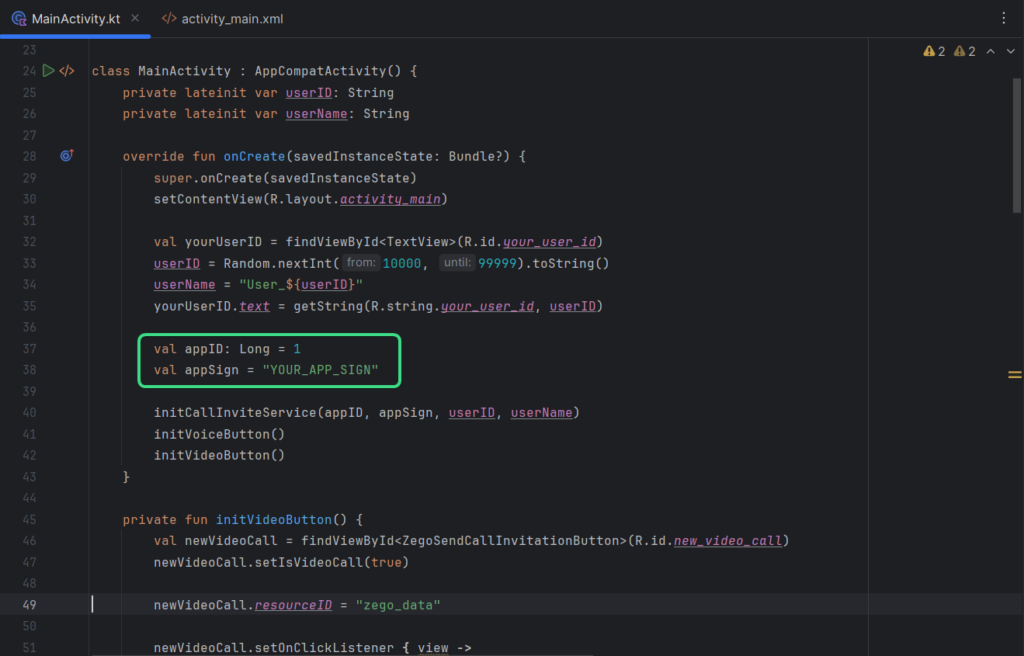
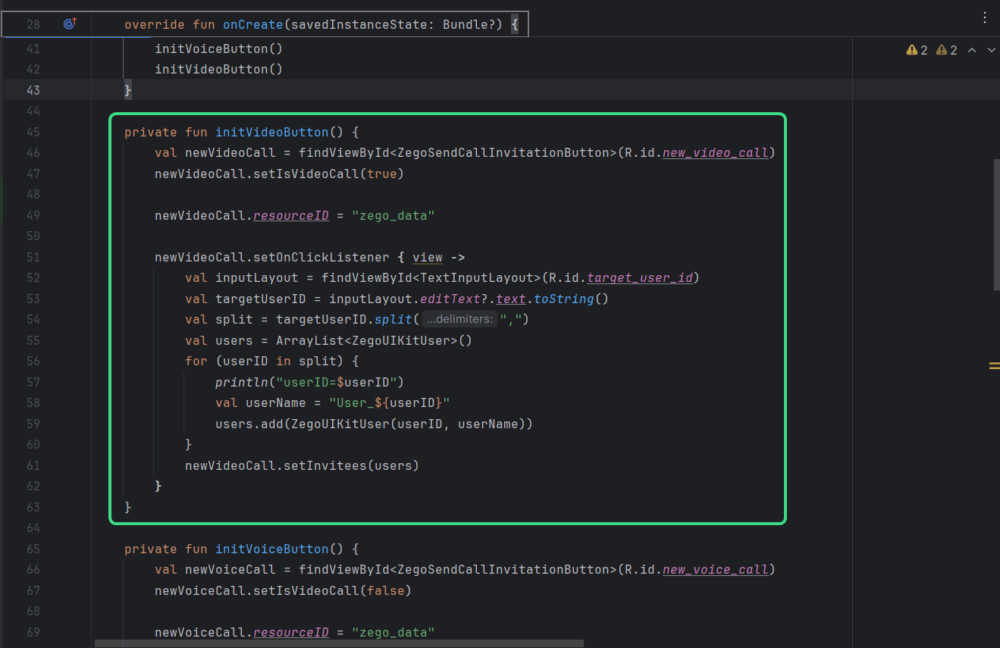
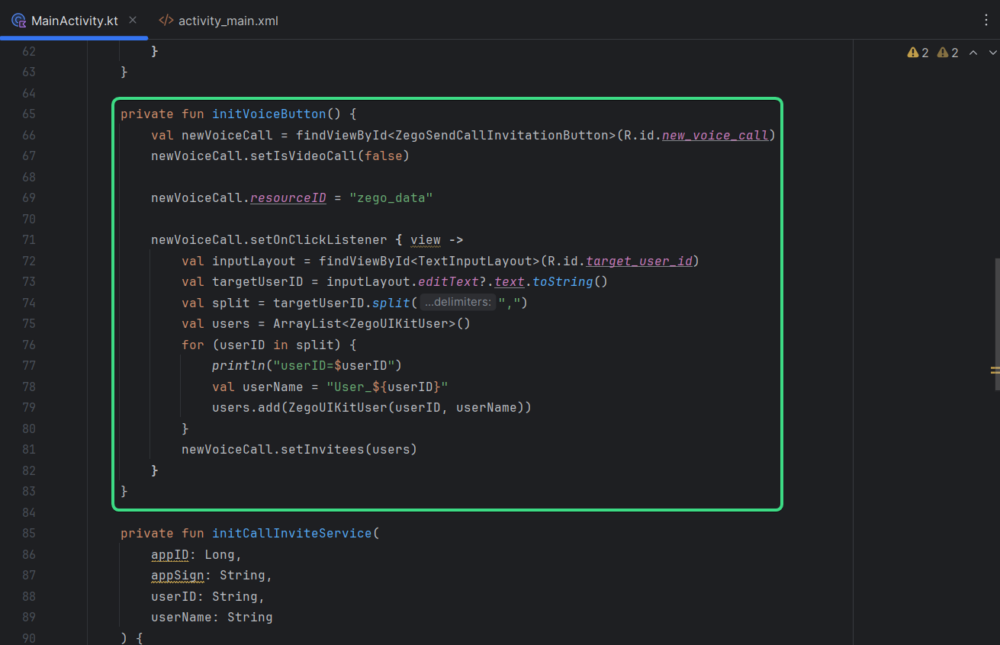
6.3 Initialize the buttons
Now we will setup the Video call and voice call button. We will grab the userIDs and separate them according to commas(,). Next we will set them as the invitees of the call inside a onClickListener.
You can just copy and paste these code inside your activity class.
private fun initVideoButton() {
        val newVideoCall = findViewById<ZegoSendCallInvitationButton>(R.id.new_video_call)
        newVideoCall.setIsVideoCall(true)

        newVideoCall.resourceID = "zego_data"

        newVideoCall.setOnClickListener { view ->
            val inputLayout = findViewById<TextInputLayout>(R.id.target_user_id)
            val targetUserID = inputLayout.editText?.text.toString()
            val split = targetUserID.split(",")
            val users = ArrayList<ZegoUIKitUser>()
            for (userID in split) {
                println("userID=$userID")
                val userName = "User_${userID}"
                users.add(ZegoUIKitUser(userID, userName))
            }
            newVideoCall.setInvitees(users)
        }
    }
private fun initVoiceButton() {
        val newVoiceCall = findViewById<ZegoSendCallInvitationButton>(R.id.new_voice_call)
        newVoiceCall.setIsVideoCall(false)

        newVoiceCall.resourceID = "zego_data"

        newVoiceCall.setOnClickListener { view ->
            val inputLayout = findViewById<TextInputLayout>(R.id.target_user_id)
            val targetUserID = inputLayout.editText?.text.toString()
            val split = targetUserID.split(",")
            val users = ArrayList<ZegoUIKitUser>()
            for (userID in split) {
                println("userID=$userID")
                val userName = "User_${userID}"
                users.add(ZegoUIKitUser(userID, userName))
            }
            newVoiceCall.setInvitees(users)
        }
    }
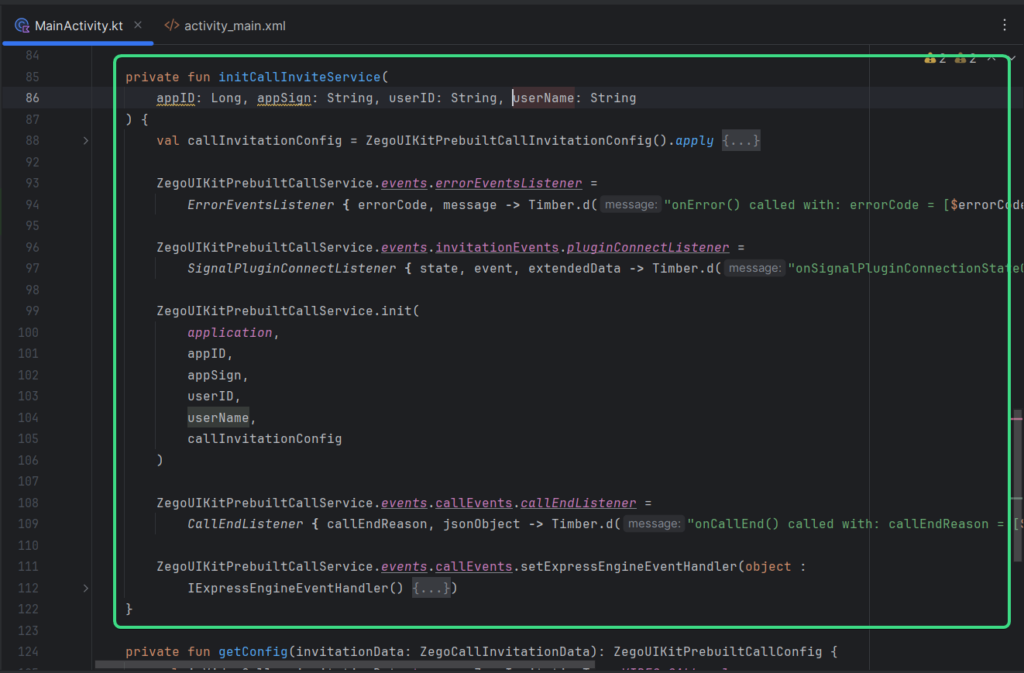
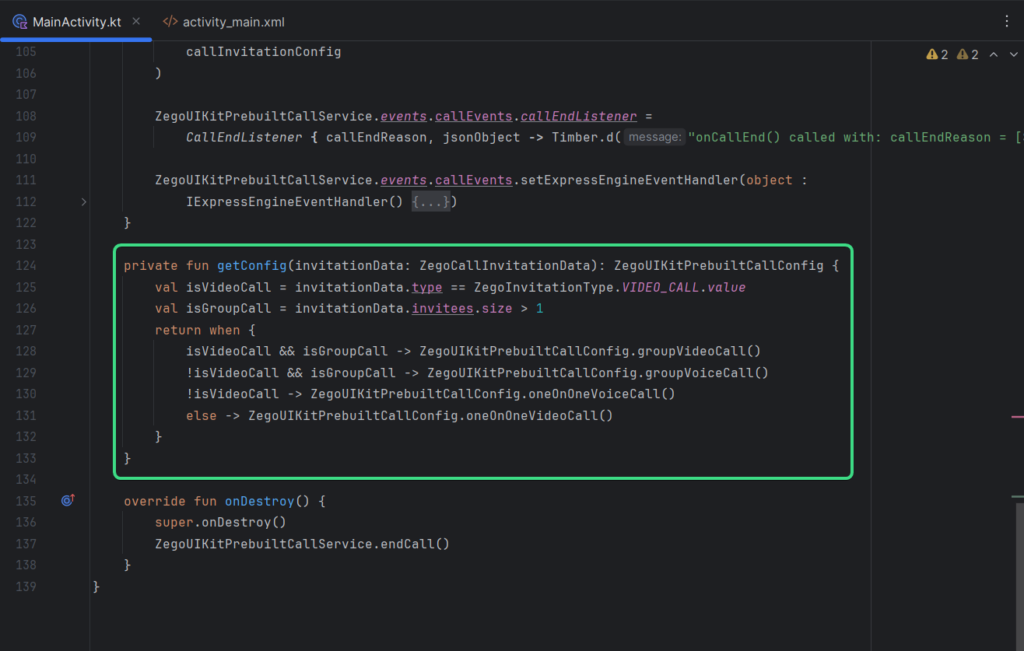
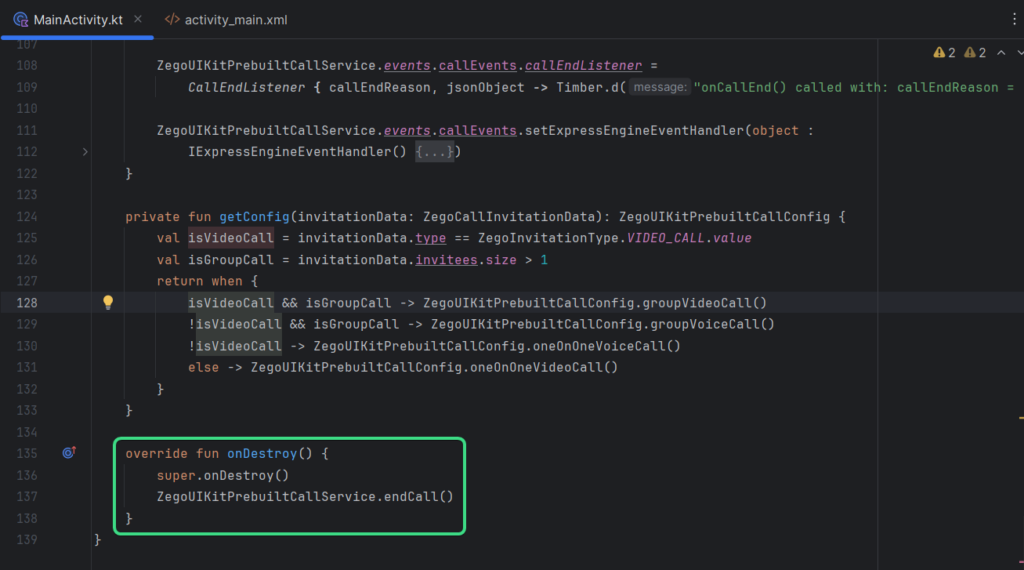
6.4 Initializing the background service
Now we need to initialize a background service to receive calls if anybody invites the user with its userID using the initCallInvitation() function. We will get the configuration for the call with the getConfig() function.
private fun initCallInviteService(
        appID: Long, appSign: String, userID: String, userName: String
    ) {
        val callInvitationConfig = ZegoUIKitPrebuiltCallInvitationConfig().apply {
            provider =
                ZegoUIKitPrebuiltCallConfigProvider { invitationData -> getConfig(invitationData) }
        }

        ZegoUIKitPrebuiltCallService.events.errorEventsListener =
            ErrorEventsListener { errorCode, message -> Timber.d("onError() called with: errorCode = [$errorCode], message = [$message]") }

        ZegoUIKitPrebuiltCallService.events.invitationEvents.pluginConnectListener =
            SignalPluginConnectListener { state, event, extendedData -> Timber.d("onSignalPluginConnectionStateChanged() called with: state = [$state], event = [$event], extendedData = [$extendedData]") }

        ZegoUIKitPrebuiltCallService.init(
            application,
            appID,
            appSign,
            userID,
            userName,
            callInvitationConfig
        )

        ZegoUIKitPrebuiltCallService.events.callEvents.callEndListener =
            CallEndListener { callEndReason, jsonObject -> Timber.d("onCallEnd() called with: callEndReason = [$callEndReason], jsonObject = [$jsonObject]") }

        ZegoUIKitPrebuiltCallService.events.callEvents.setExpressEngineEventHandler(object :
            IExpressEngineEventHandler() {
            override fun onRoomStateChanged(
                roomID: String,
                reason: ZegoRoomStateChangedReason,
                errorCode: Int,
                extendedData: JSONObject
            ) {
                Timber.d("onRoomStateChanged() called with: roomID = [$roomID], reason = [$reason], errorCode = [$errorCode], extendedData = [$extendedData]")
            }
        })
    }

    private fun getConfig(invitationData: ZegoCallInvitationData): ZegoUIKitPrebuiltCallConfig {
        val isVideoCall = invitationData.type == ZegoInvitationType.VIDEO_CALL.value
        val isGroupCall = invitationData.invitees.size > 1
        return when {
            isVideoCall && isGroupCall -> ZegoUIKitPrebuiltCallConfig.groupVideoCall()
            !isVideoCall && isGroupCall -> ZegoUIKitPrebuiltCallConfig.groupVoiceCall()
            !isVideoCall -> ZegoUIKitPrebuiltCallConfig.oneOnOneVoiceCall()
            else -> ZegoUIKitPrebuiltCallConfig.oneOnOneVideoCall()
        }
    }
6.5 Call the functions inside onCreate()
Now we need to call the functions from the onCreate() function.
initVideoButton()
        initVoiceButton()
        initCallInviteService(appID, appSign, userID, userName)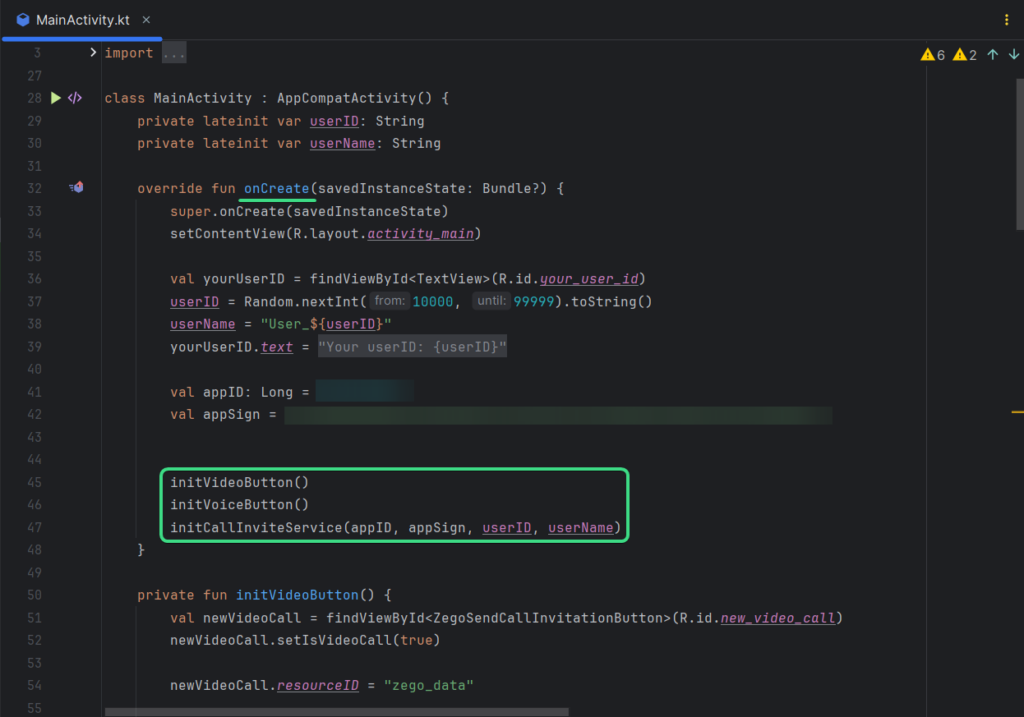
6.6 End the call when the Activity is destroyed
If the Activity is closed, we will end the call using the below function.
override fun onDestroy() {
        super.onDestroy()
        ZegoUIKitPrebuiltCallService.endCall()
    }
6.7 Test the app
Now our video call app is ready, you will need two devices to test the app.
Conclusion
This is how you can create a simple video calling app or you can easily add calling functionality in your existing app.
Leave a Reply